1. Welcome to Game Dog Forum

    You are currently viewing our forum as a guest which gives you limited access to view most discussions and access our other features. By joining our free community, you will have access to post topics, communicate privately with other members (PM), respond to polls, upload content and access many other special features. Registration is simple and absolutely free so please, join our community today!

    If you have any problems with the registration process or your account login, please contact us.

    Dismiss Notice

Tutorial: How to Post Pics

Discussion in 'Dog Photo Contest' started by bahamutt99, Feb 21, 2009.

  1. bahamutt99

    bahamutt99 CH Dog

    Since this is a relatively common question, here is a visual tutorial on how to post pictures on Game-Dog and have them show within your post. This tutorial will cover two different methods of embedding images: hosting and sharing with Photobucket, and hosting and sharing with our built-in Game-Dog galleries. There are other photo hosts available, but for now, we'll start with these two.

    (Please bear with the load times for this post. Photos in this post are in the PNG format, which has a larger file size.)

    ~~~~~~~~~~~~~~~~~~~~~~~~~~~~~~~~~~~~~~~~~~~~~~~~~~
    Hosting and Sharing Photos with Photobucket
    ~~~~~~~~~~~~~~~~~~~~~~~~~~~~~~~~~~~~~~~~~~~~~~~~~~

    1. First, go to www.photobucket.com and sign up for an account. Or if you already have an account, sign in. From the main page, you will look for My Albums > Albums & Upload.

    [​IMG]

    2. Click on Albums & Upload, and that will take you to a screen similar to this one:

    [​IMG]

    3. Before you go to upload a photo from your hard drive, you can save yourself the trouble of resizing by setting the automatic resizer to an appropriate size. For the photo contests on Game-Dog, 800 x 600 pixels would be the maximum. A more user-friendly size is 640 x 480.

    [​IMG]

    4. Click on the big blue button which says Choose Files. This will pop up a window allowing you to access your computer. It is up to you to find the location of the picture you want to upload. (If you are going to be uploading multiple pictures, you can hold down the Ctrl key while clicking multiple files, or use your mouse to drag and highlight them.) Click "Open" when you've selected your file(s).

    [​IMG]

    5. Wait for the files to upload.

    [​IMG]

    6. The screen should then refresh, and you will see the picture(s) you uploaded. If you want, check out Photobucket's "edit" option to add text, flip, rotate, play with effects, resize, fix red eye, and do other cool stuff to your pics.

    [​IMG]

    7. Locate the "IMG" code (sometimes called BB code) which will always begin with brackets. Copy that code.

    [​IMG]

    8. Paste that code into the body of your post.

    [​IMG]

    9. This is what you should see:

    [​IMG]

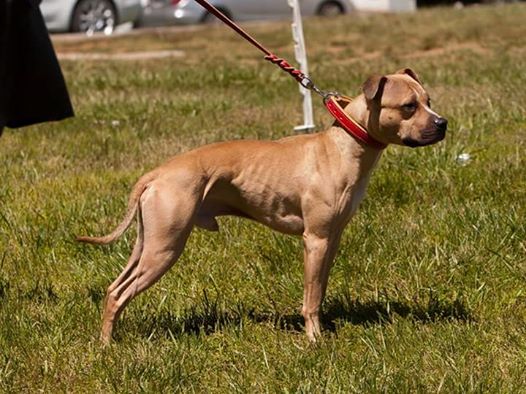
    10. Then all you have to do is submit your post and -- if correctly done -- the code will automatically change into a picture like this:

    [​IMG]
     
  2. bahamutt99

    bahamutt99 CH Dog

    ~~~~~~~~~~~~~~~~~~~~~~~~~~~~~~~~~~~~~~~~~~~~~~~~~~
    Hosting and Sharing Photos with Game-Dog.com Galleries
    ~~~~~~~~~~~~~~~~~~~~~~~~~~~~~~~~~~~~~~~~~~~~~~~~~~


    1. First, locate the Gallery link at the top of the page. Click on it.

    [​IMG]

    2. From the next screen, locate the Upload link and click on that.

    [​IMG]

    3. That should take you to a screen similar to this one, with empty text fields.

    [​IMG]

    4. Under the area that says Upload Files from your Computer, click Browse, and locate the photo that you want to upload from your computer in the window which pops up. Select the photo and click Open. Repeat this step for the other empty text fields if you want to upload more than 1 photo. (Maximum per upload is 3.)

    [​IMG]

    5. Fill in the other empty fields with information such as picture title and description, if you so desire. Adding "tags" will allow people to search for your photos within the Galleries.

    [​IMG]

    6. Select the category you wish your photos to be uploaded into. For the vast majority of pictures, you should select Member's Categories. Then click Submit.

    [​IMG]

    7. Depending upon your status, you may have to wait for a moderator to manually approve your photos. This process may take some time. When your photos have been approved, this his how to find them. Click on Gallery at the top of the screen again, then click where it says My Stuff. This will bring up a drop-down menu, and you should select My Images.

    [​IMG]

    8. You should then see a screen like this, which shows you all the photos you've uploaded which have been approved. Click on the picture that you want to share.

    [​IMG]

    9. Note the field which says BB Image Code. If you want to share your image as a clickable thumbnail -- ie, a small image which you can click on to see a larger one -- copy the code in that field. Skip to step 12.

    [​IMG]

    10. If you want to share your image as a full size picture, right-click on the image itself and select Properties.

    [​IMG]

    11. In the window which pops up, you will want to highlight and copy the location of the image. (If it is a long link, you might need to right-click on it and select "select all.")

    [​IMG]

    12. From the "new post" or "reply" pages, you will paste the code you copied into your post. If you copied the thumbnail code, it already has the tags on it, so all you will need to do is paste that directly into the post and you're done.[/I] If you copied the location, you will need to add the tags yourself. Do this by locating the [B]"insert image"[/B] icon. Click it.

    [IMG]http://i3.photobucket.com/albums/y74/bahamutt99/misc/GD_tutorial/GDstep12.png

    13. In the text field, paste the code you copied and click OK.

    [​IMG]

    14. The board should automatically convert your code into an image, and you will be able to see it directly in your post. From there, all you have to do is finish whatever else you want to post with your message and click Submit.

    [​IMG]
     

Share This Page